Use Blysh inside your favorite AI
Connect it once — 2 minutes — and ask about the legal library and case law right inside Claude, ChatGPT or Perplexity. Your notes join in once you switch that on in your profile.
Connector URL
It is the same for every client. Paste it when you are asked for the MCP server address.
https://mcp.bly.sh/mcpWhat you need
- A Blysh account. Create an account
- Accepting the Terms and the Privacy Policy the first time you connect. Until you do, the tools that touch your own notes answer by asking for that acceptance.
- By default your AI only searches the legal library. For it to see your notes too, switch that on in your profile (bly.sh/dashboard/profile). While it is off, those tools answer by explaining what they do and how to switch them on.
- Nothing to install. The connector is remote, authenticates over OAuth, and works even on free plans.
Claude
You add the connector on claude.ai (web); after that it also works on Desktop and mobile — even on the free plan.
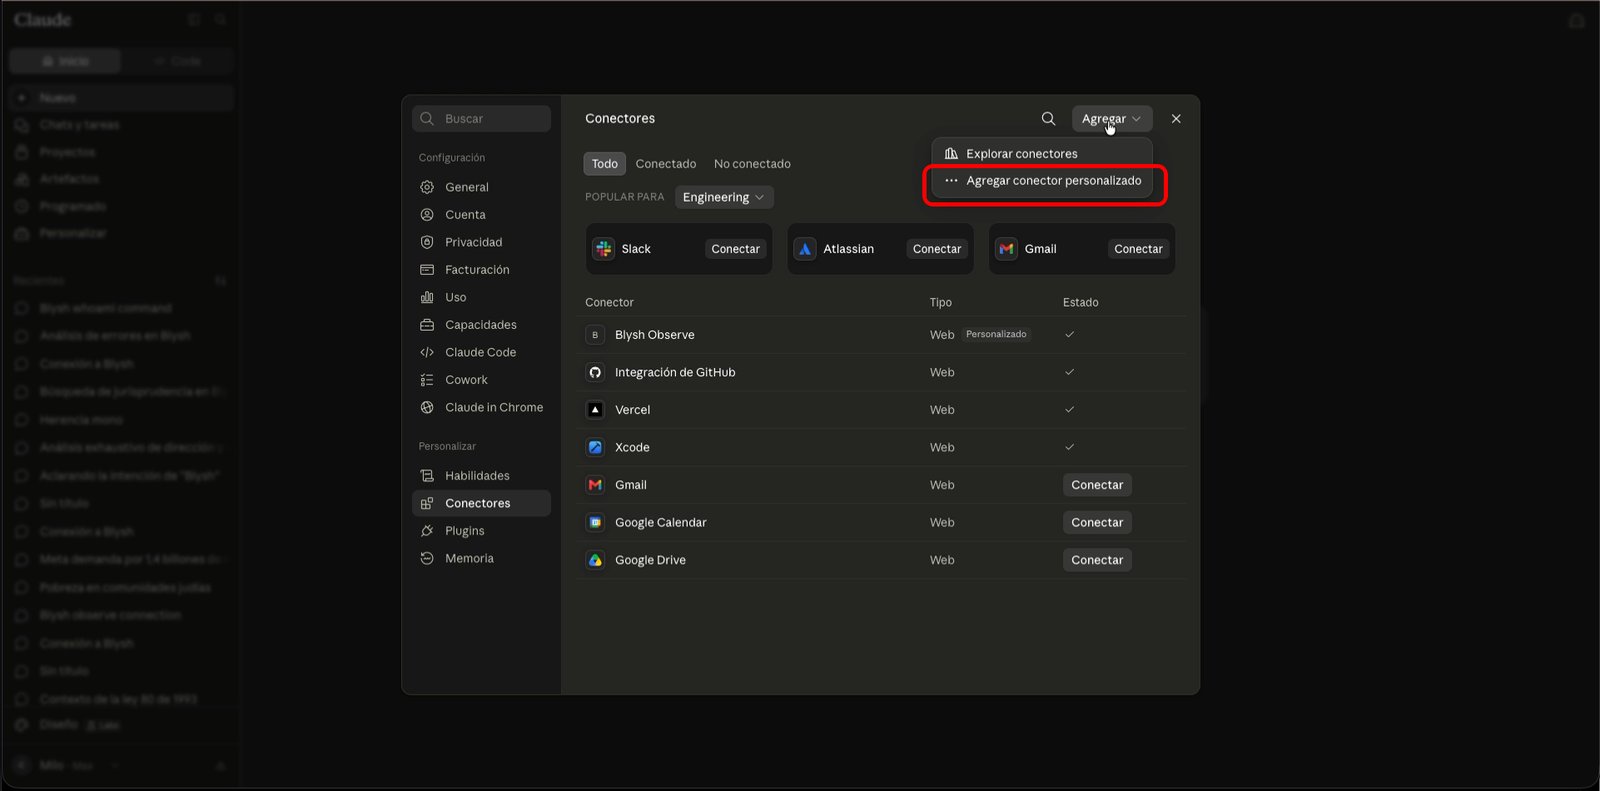
- In Claude open Settings → Connectors, click Add (top right) and choose Add custom connector.
- Enter the name blysh, paste the connector URL, and leave the advanced settings empty. Click Add.
https://mcp.bly.sh/mcp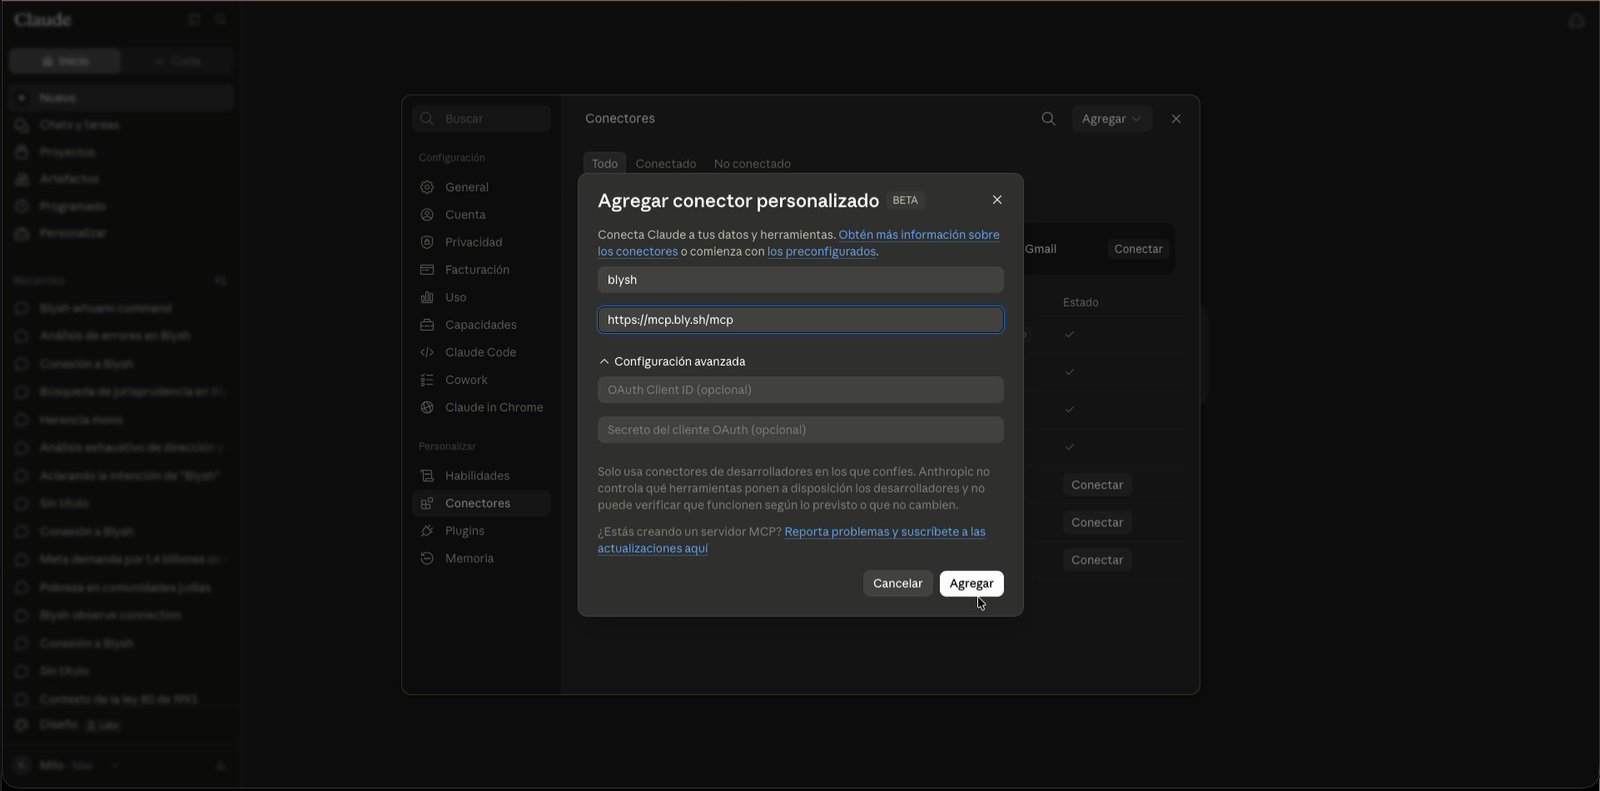
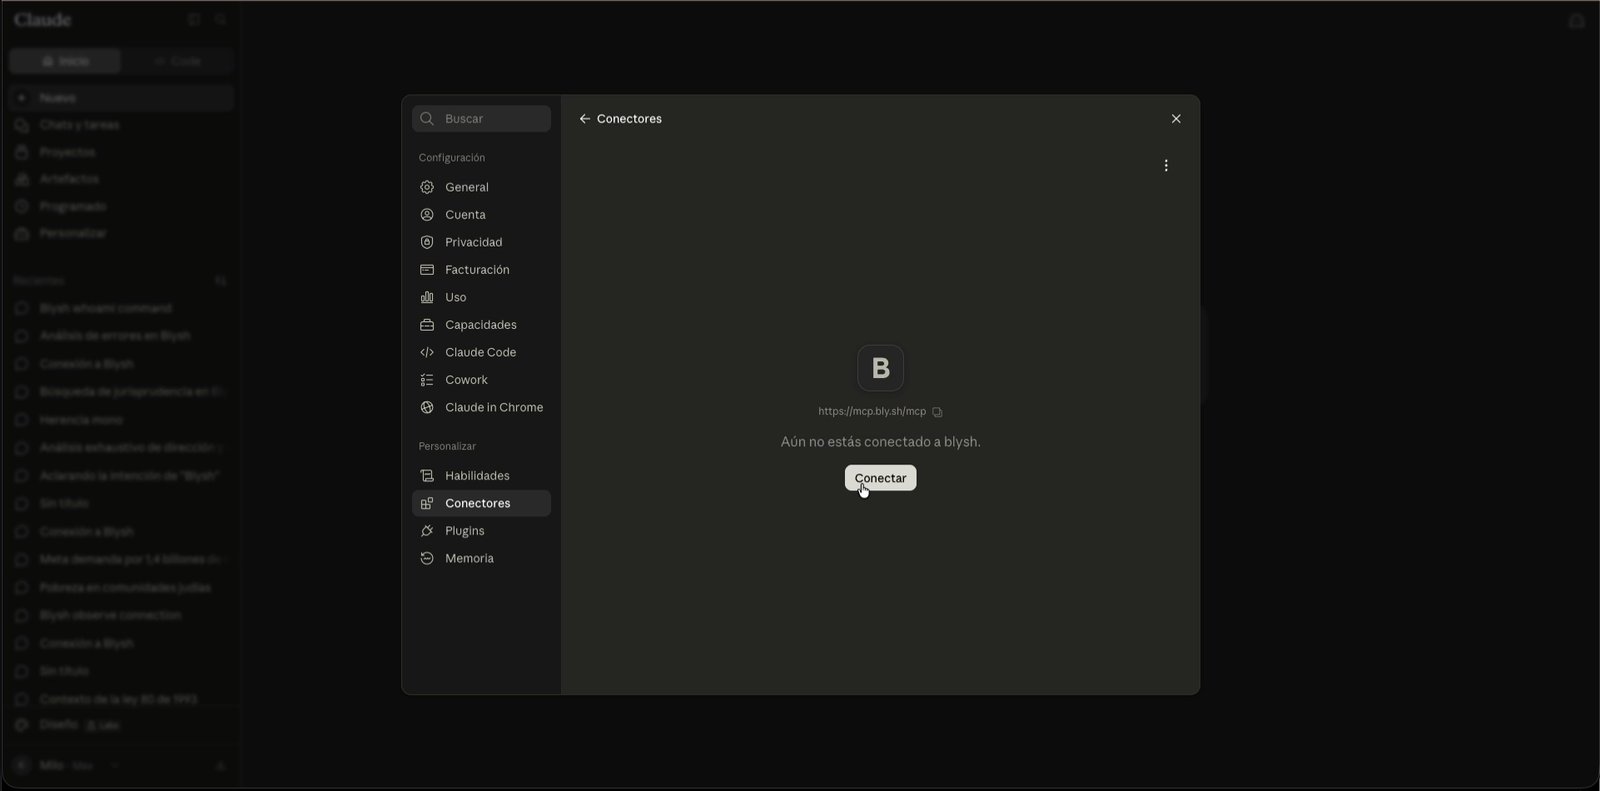
- The connector shows "You are not connected to blysh yet": click Connect.
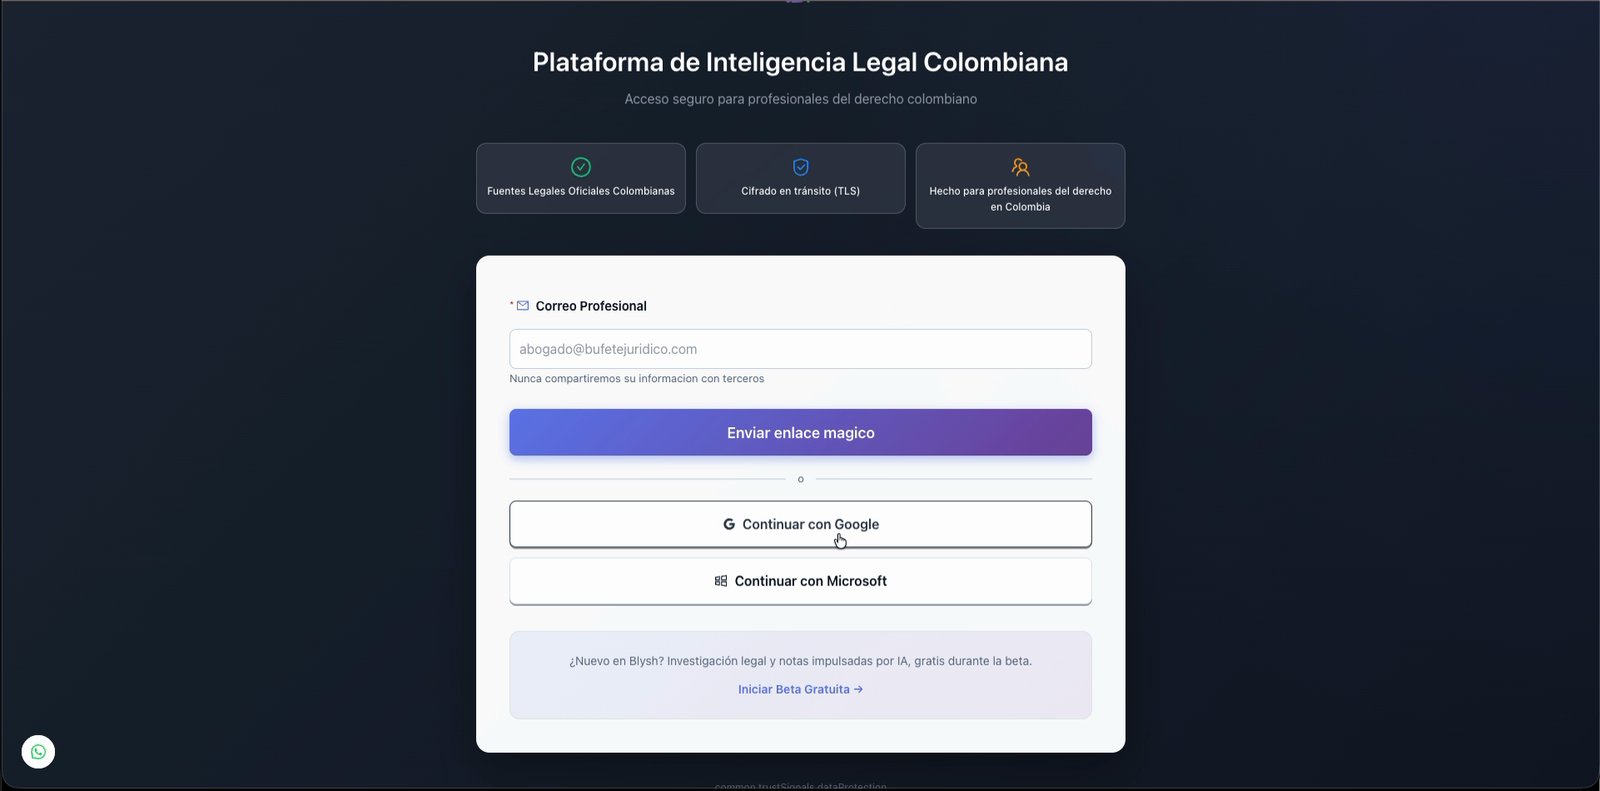
- A Blysh tab opens: sign in with your account (Continue with Google, the email magic link, or Microsoft).
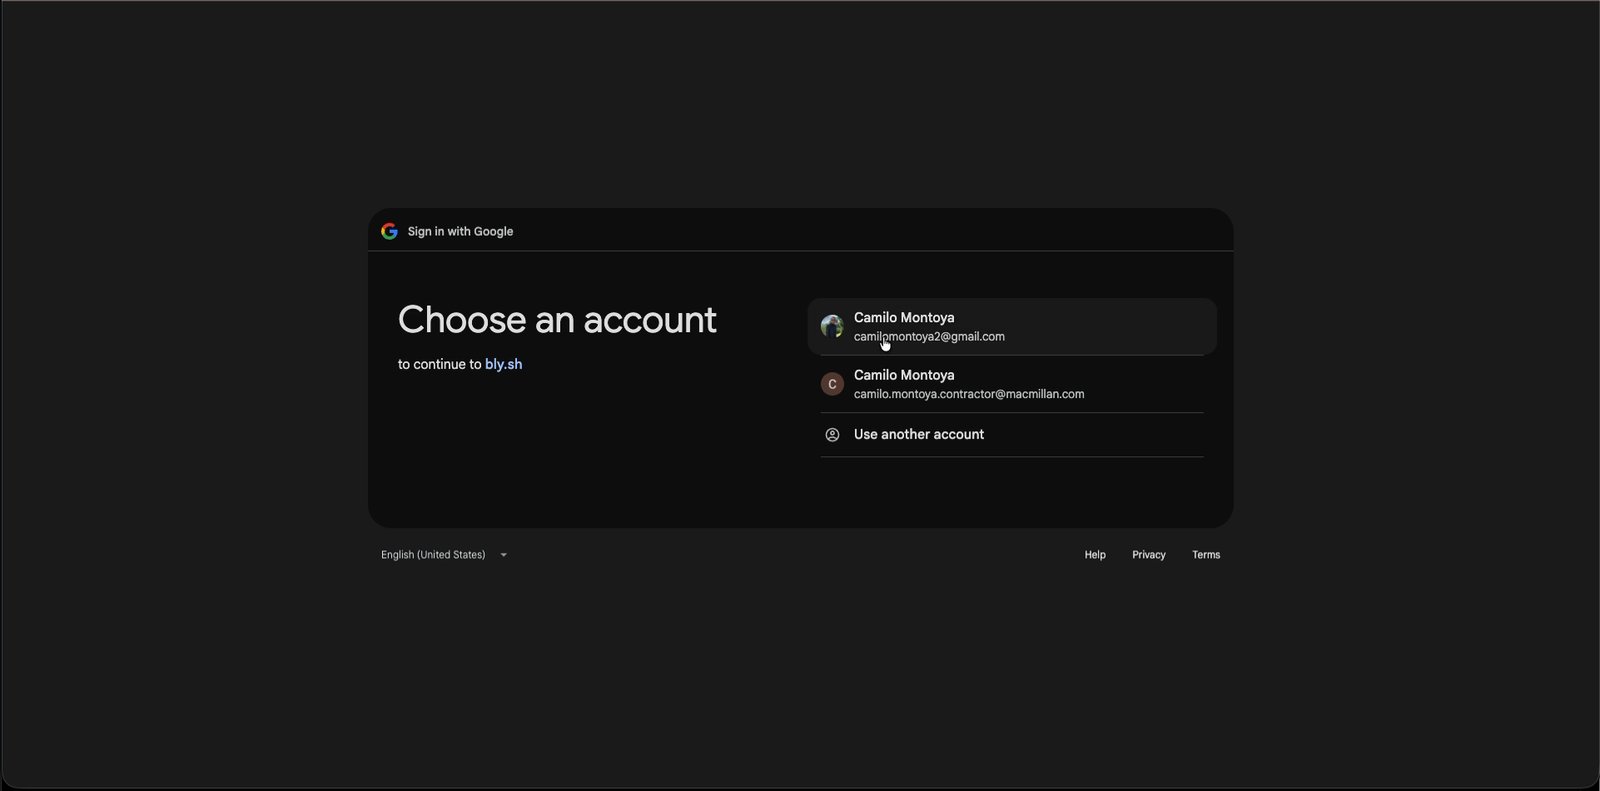
- Pick the account you use with Blysh.
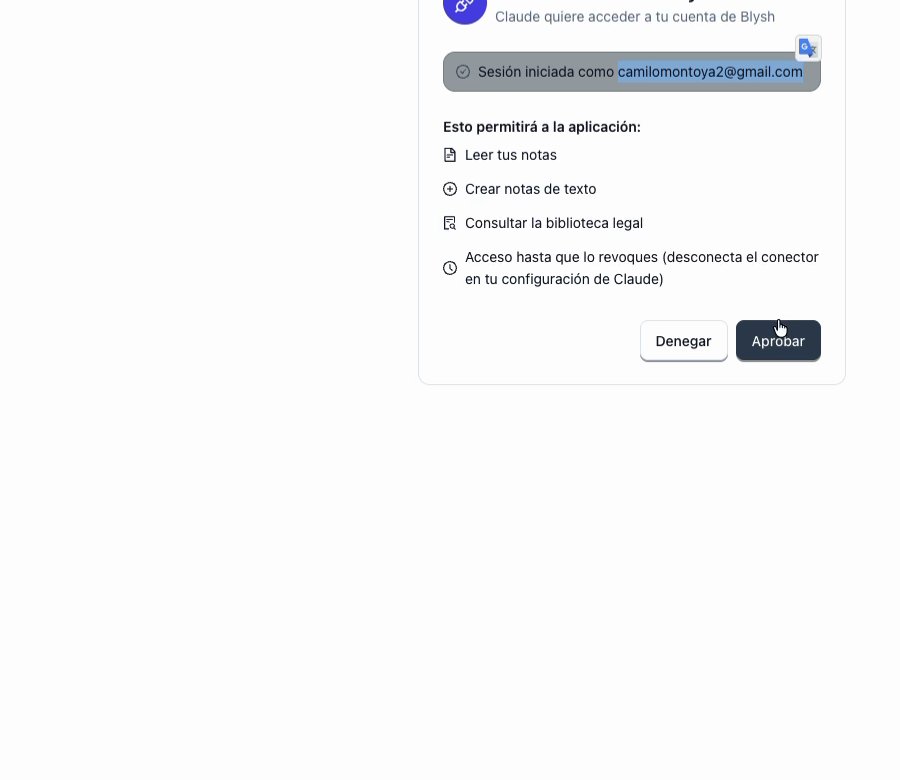
- Review the permissions — search the legal library and, if you switched them on in your profile, read and create notes — and click Approve.
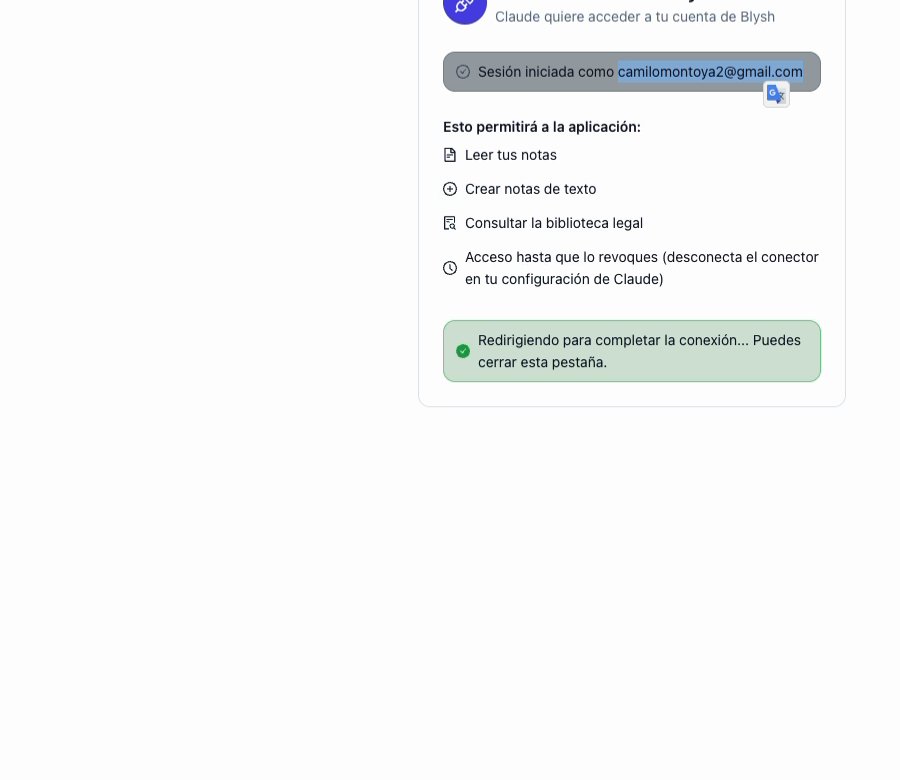
- You'll see "Redirecting to complete the connection…". You can close that tab and go back to Claude.
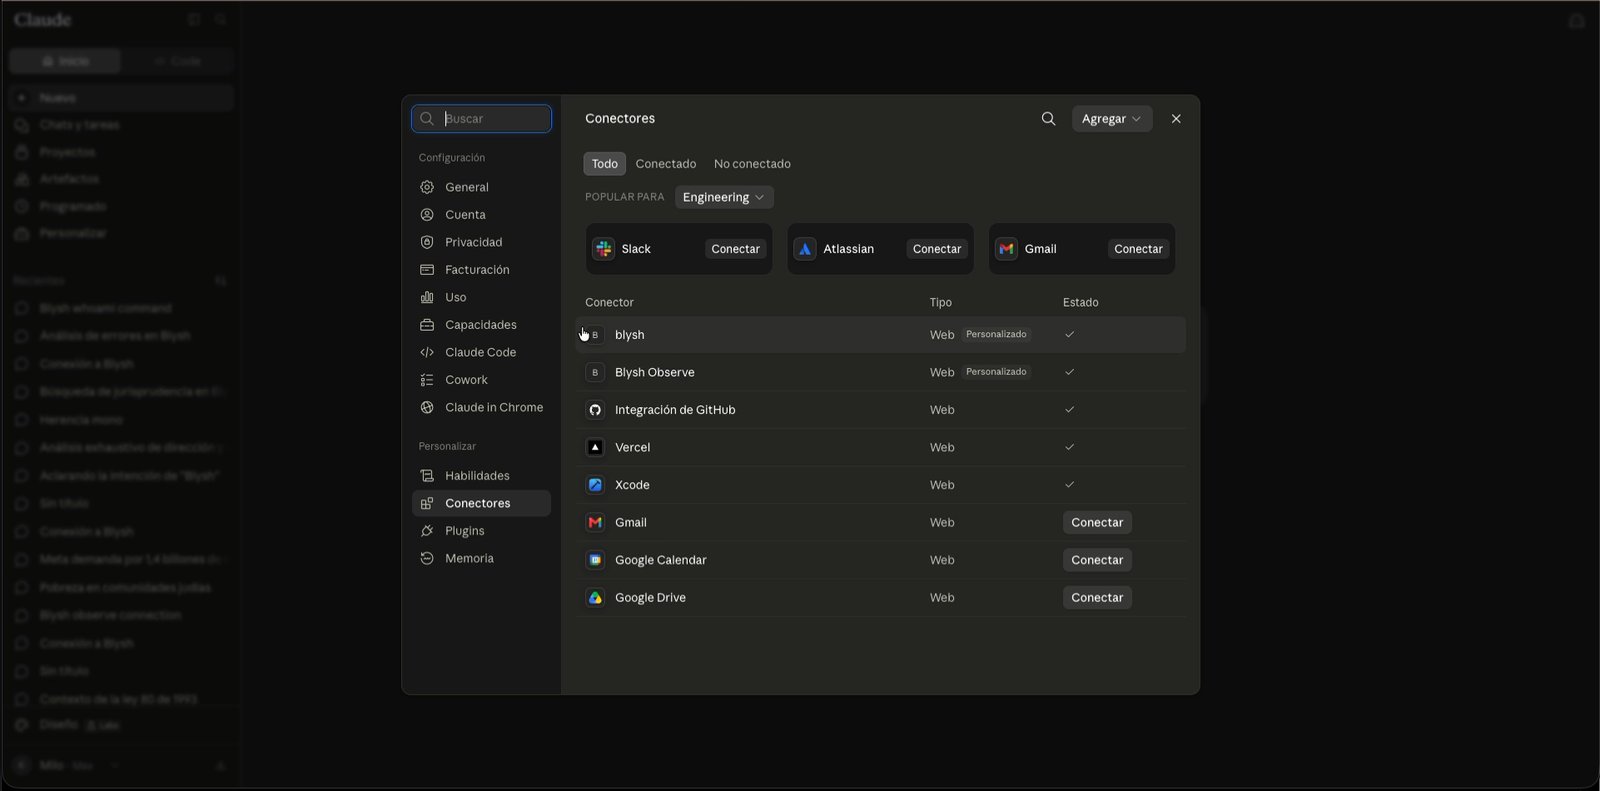
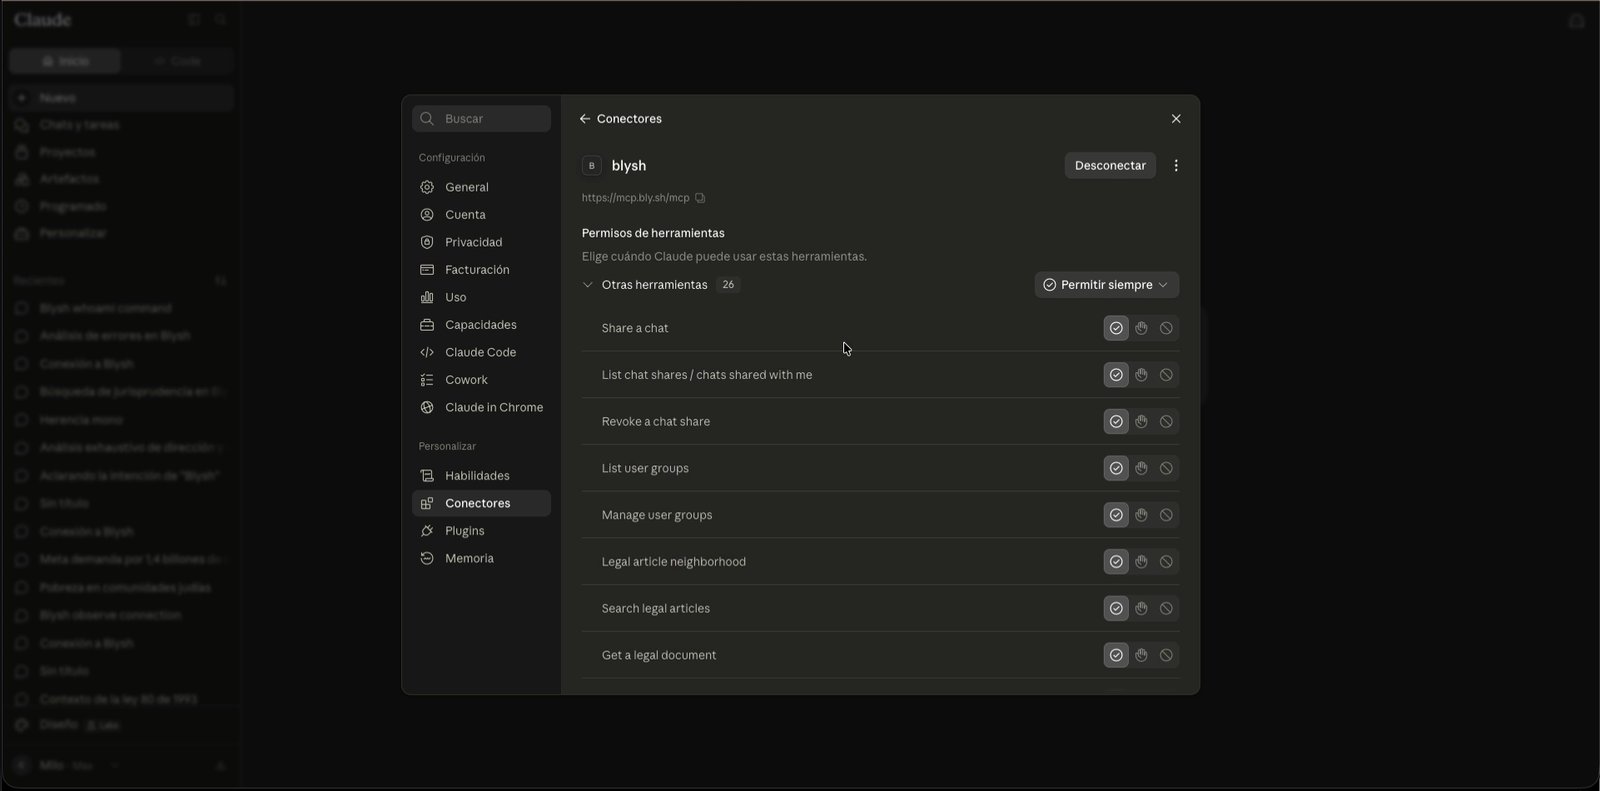
- Back in Connectors, blysh shows as connected (✓). Open it to adjust each tool's permission.
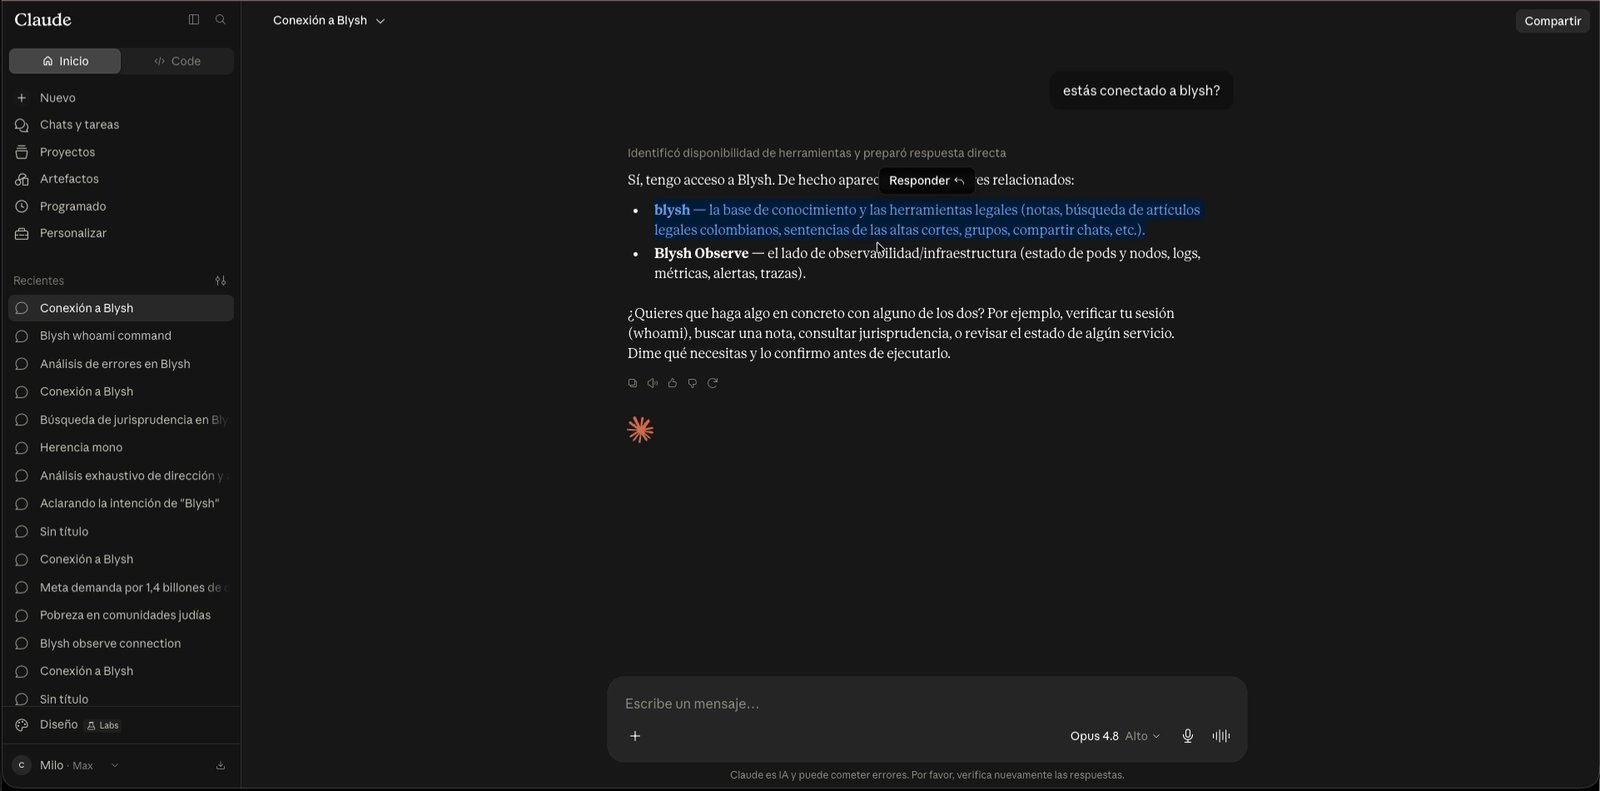
- (Optional) Ask Claude: "are you connected to blysh?" — it should confirm it has access.
Add it on claude.ai (web) first; after that it works on mobile too. Even Claude's free plan includes 1 custom connector.
Using Claude Code? Run
claude mcp add --transport http blysh https://mcp.bly.sh/mcpChatGPT
In ChatGPT, custom connectors live under Plugins and only appear with developer mode on — that's the first step.
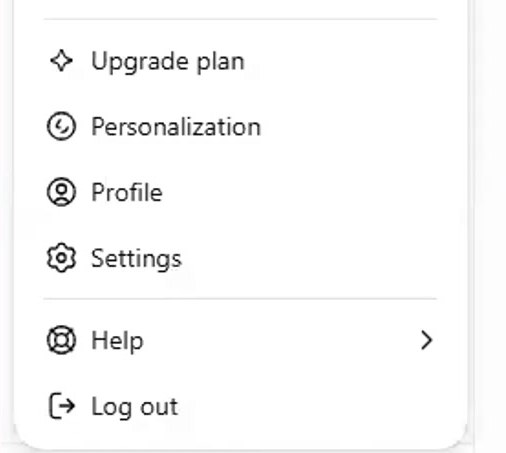
- In ChatGPT click your name (bottom left) and choose Settings.
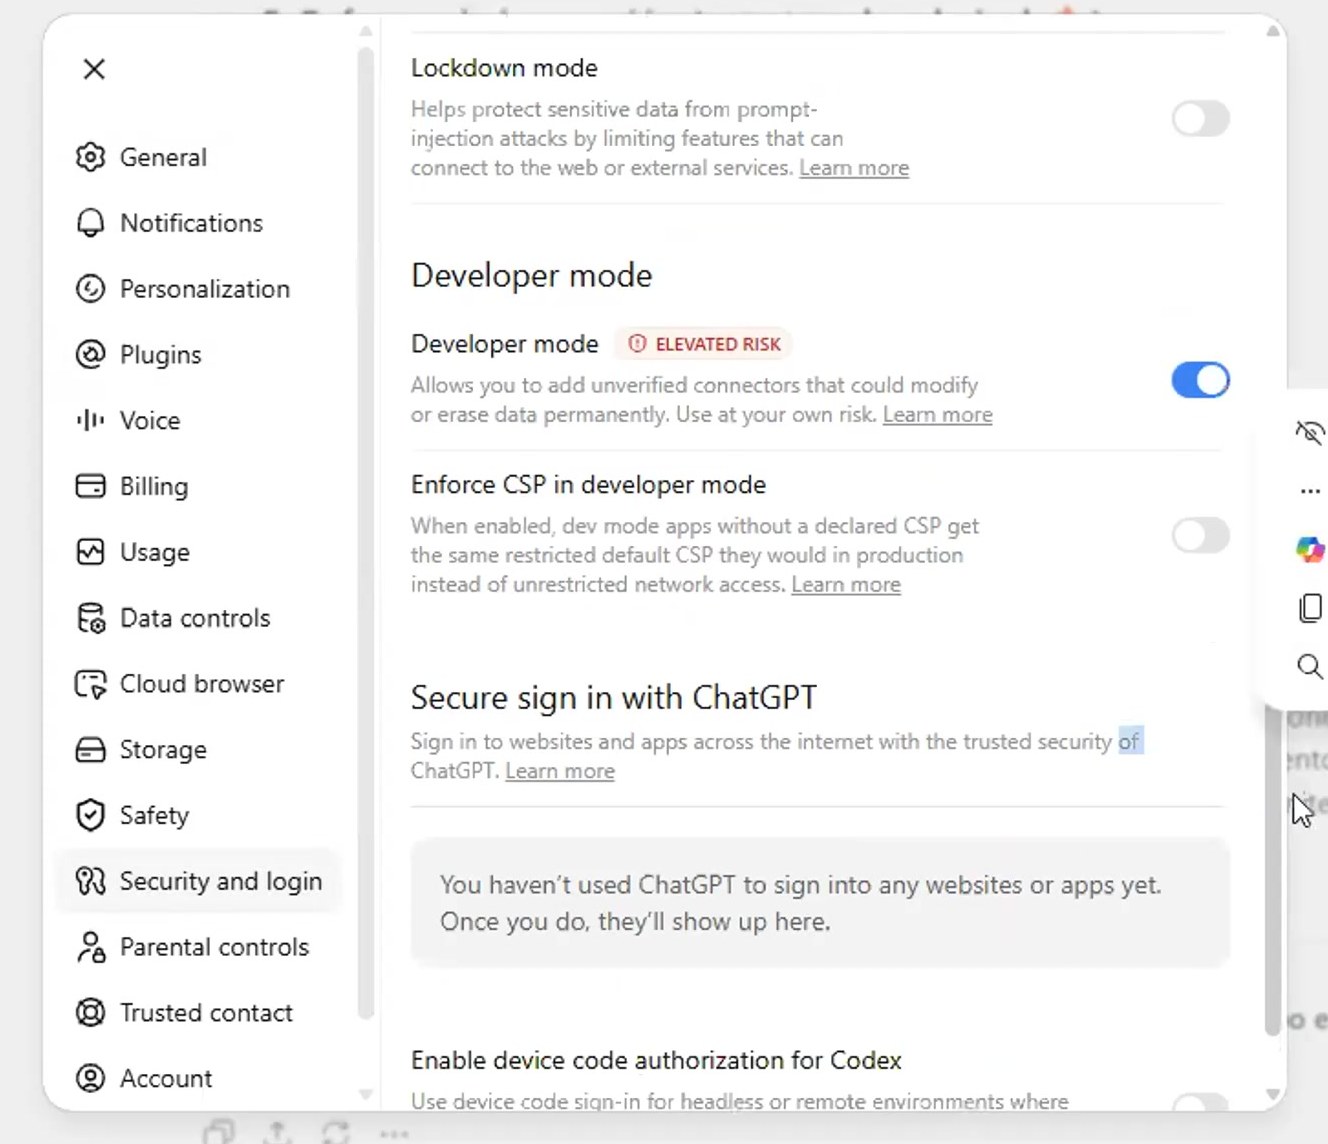
- Open the Plugins tab and, at the bottom, open Developer mode: you'll land on Security and login → Advanced security. Turn on the Developer mode switch (it's flagged ELEVATED RISK because it enables connectors OpenAI hasn't reviewed; it's what lets you add Blysh's).
- Close Settings, open Plugins in the left menu, and click the + button next to the search box.

- In the New Plugin dialog: Name blysh; under Connection keep Server URL and paste the connector URL; leave Authentication on OAuth (the default) and don't open Advanced OAuth settings. Check I understand and want to continue and click Create.
https://mcp.bly.sh/mcp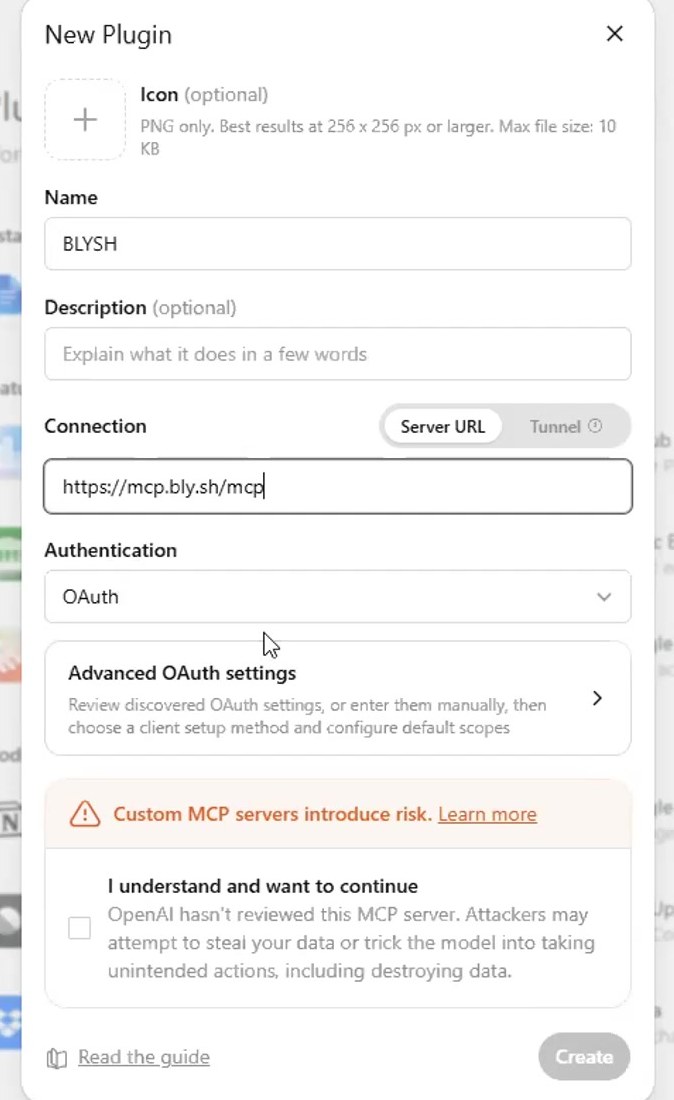
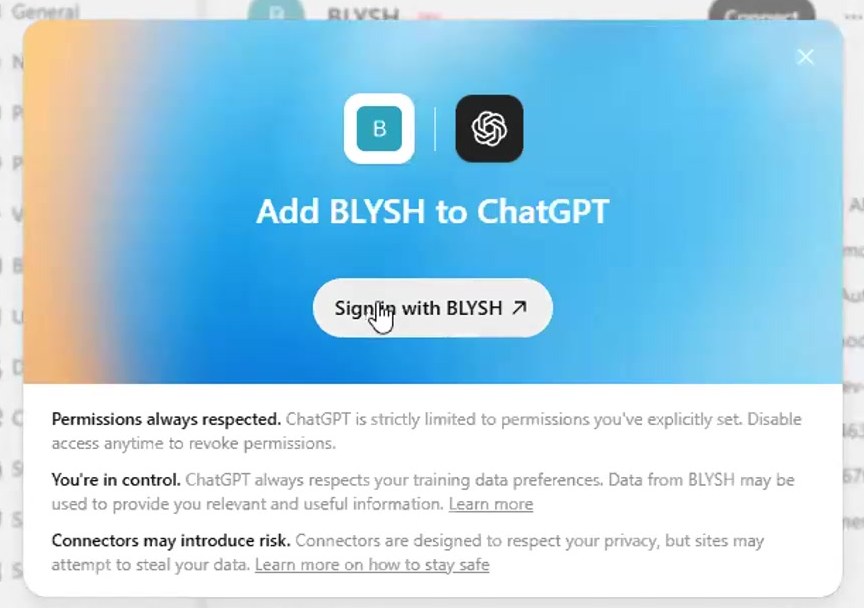
- The Add BLYSH to ChatGPT dialog appears: click Sign in with BLYSH.
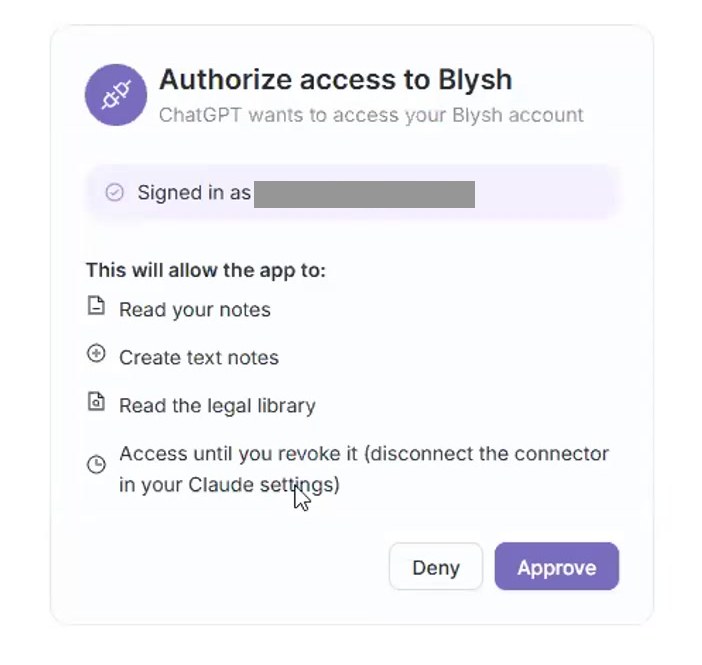
- A Blysh tab opens: sign in if needed, review the permissions, and click Approve.
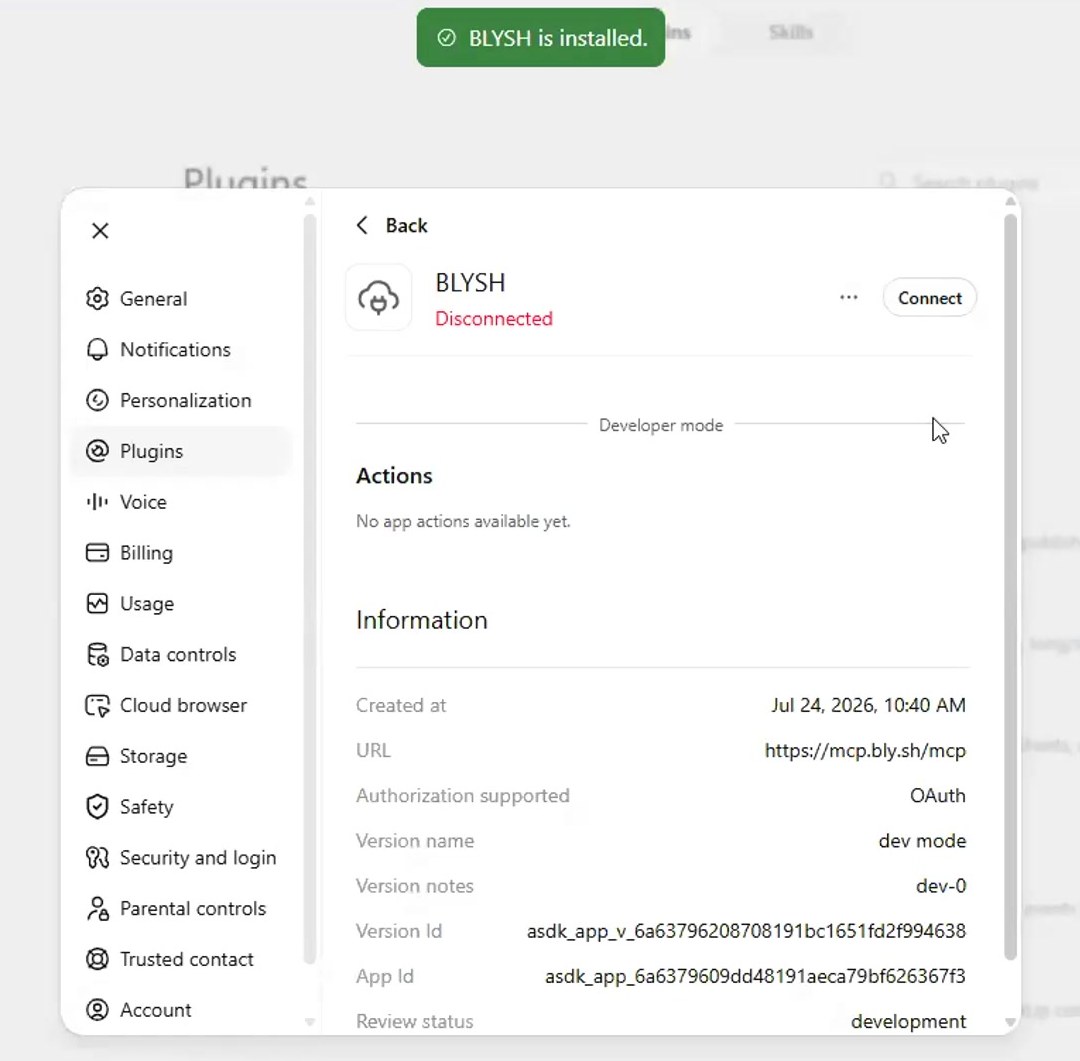
- You're back in ChatGPT with BLYSH is installed. The dev mode and development marks on the card are normal.
- (Optional) Open a new chat, check the BLYSH chip appears, and ask something concrete, e.g. "find me a ruling about alcoholism and family law": Sources should list BLYSH.
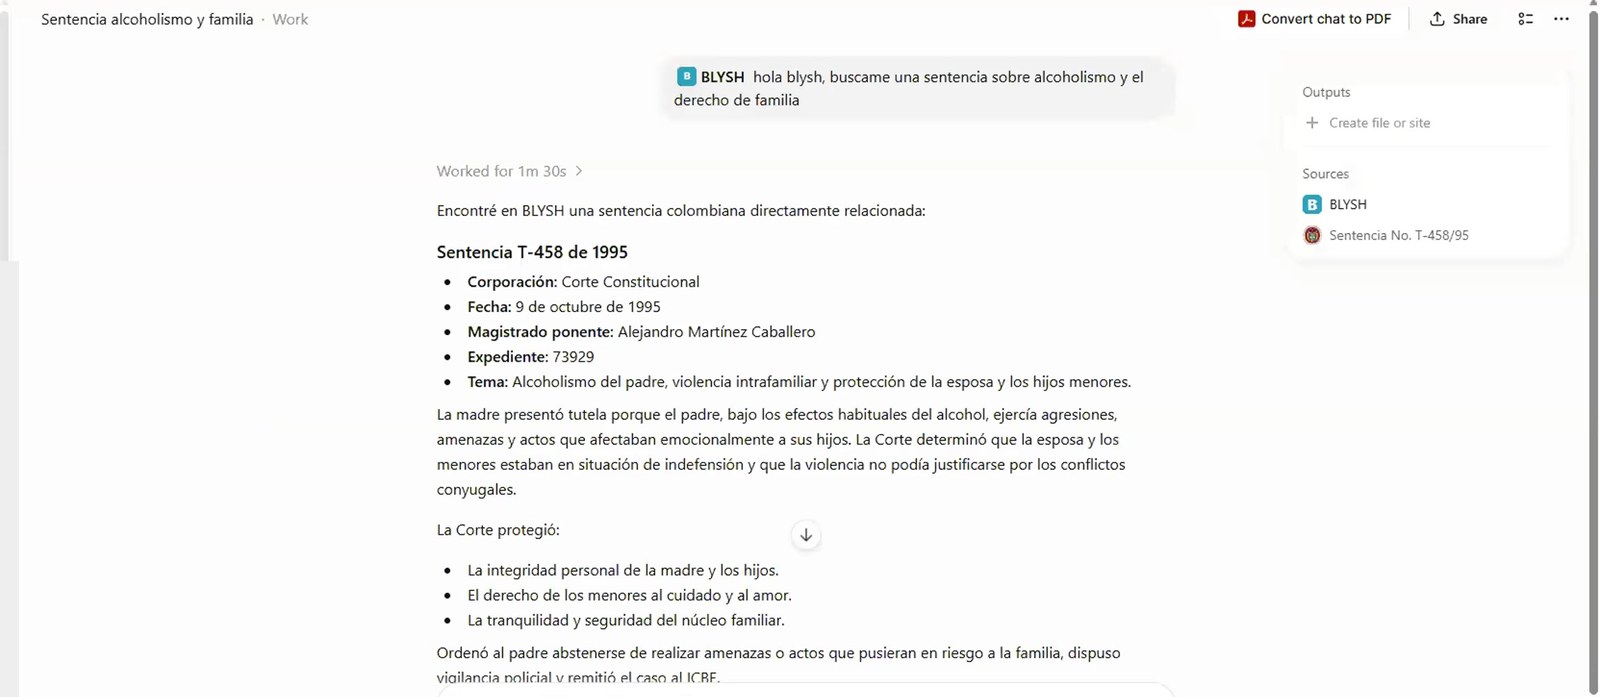
If the card still says "Disconnected" after approving, click Connect and reload the page: once access is approved the connector works even if that label lags.
Perplexity
In Perplexity it's two parts: first you add the connector to your account, then you enable it in the search where you want it.
- In Perplexity go to Computer → Connectors (or straight to perplexity.ai/computer/connectors) and click + Add custom connector.
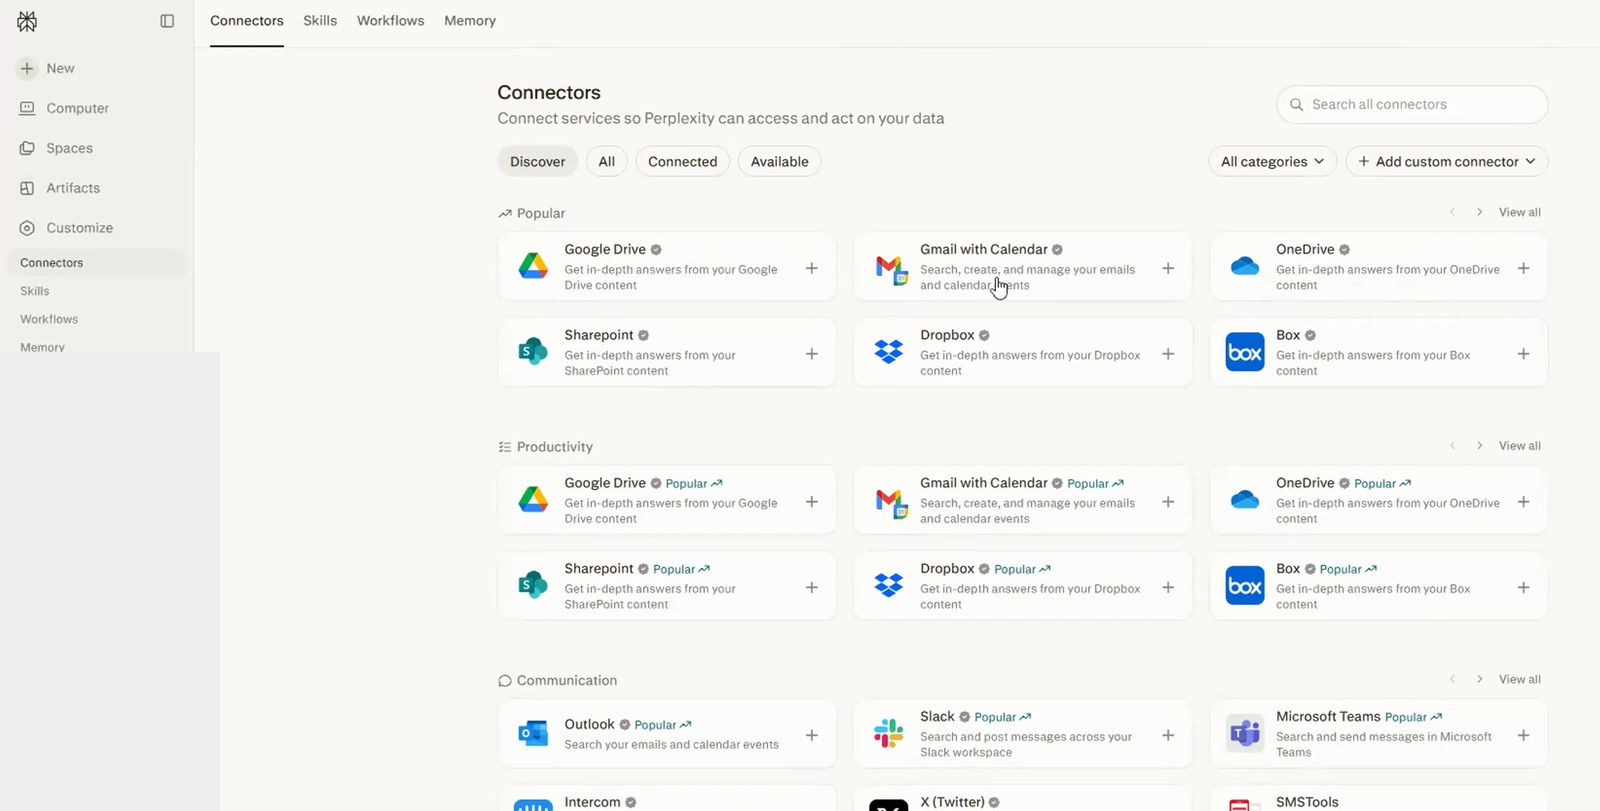
- Fill in: Name blysh, and paste the connector URL into MCP server URL; leave Description empty and Advanced closed. Check I understand custom connectors can introduce risks and click Add.
https://mcp.bly.sh/mcp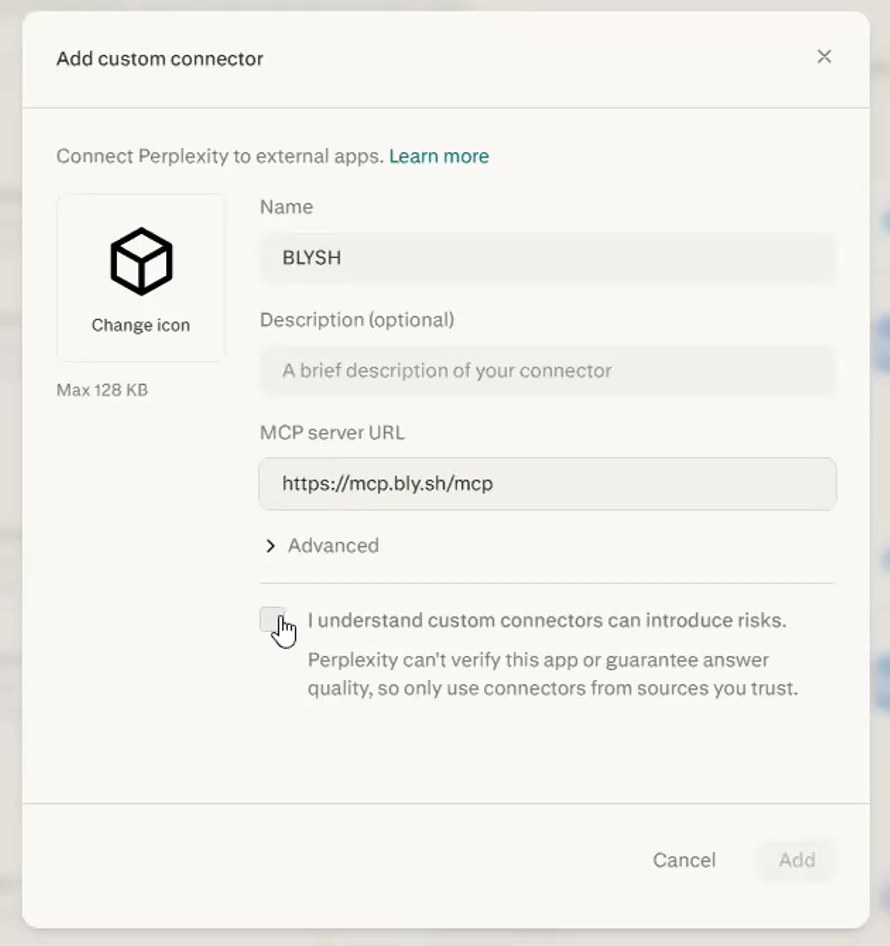
- The connector appears under Custom as BLYSH: click that card's + to connect your account.
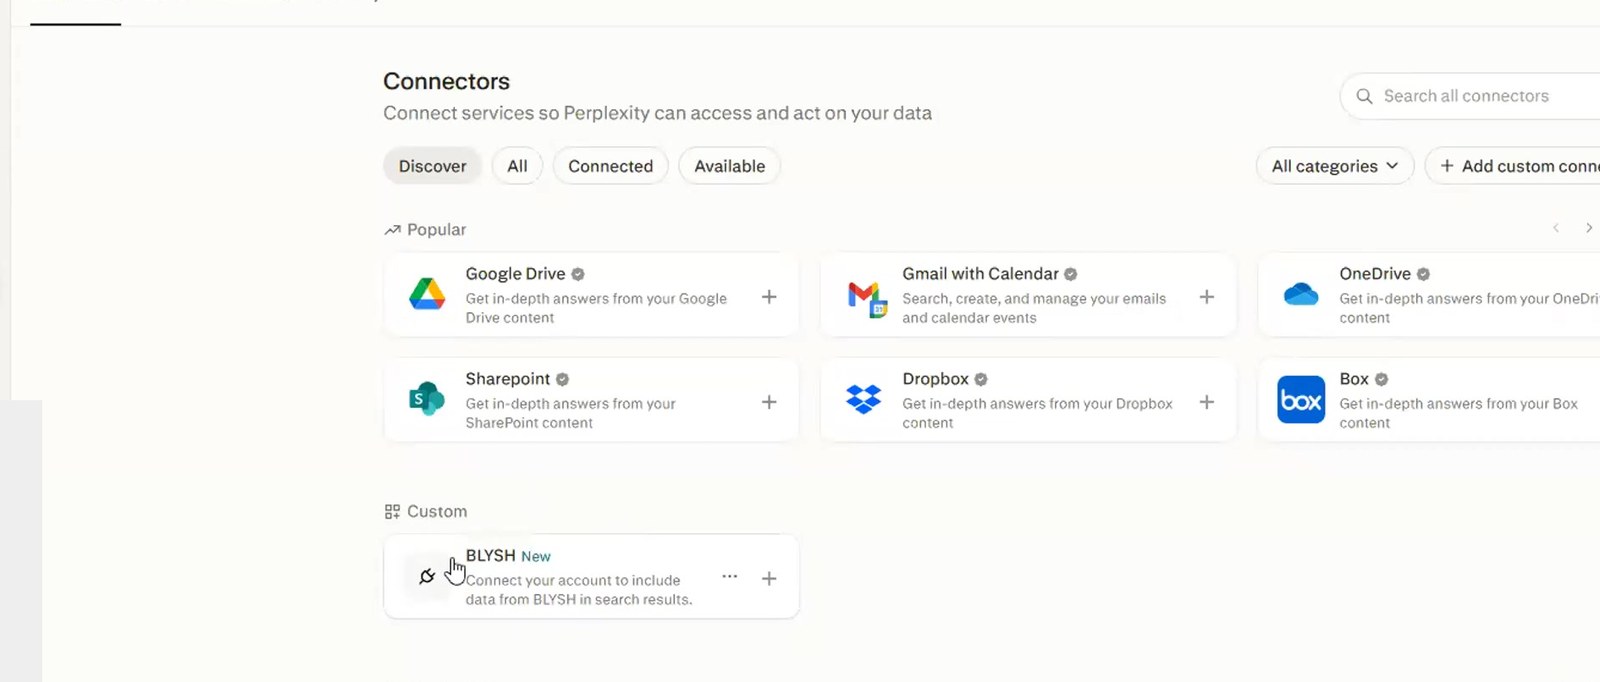
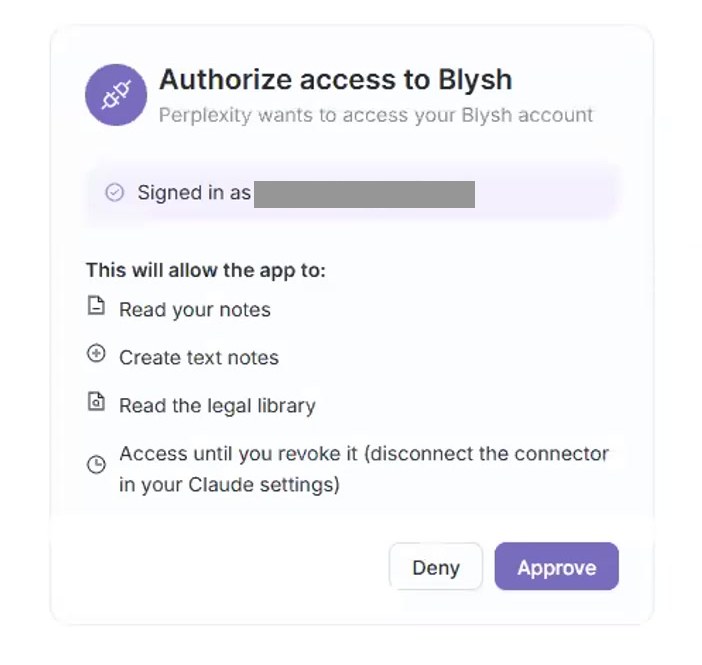
- A Blysh tab opens: sign in if needed, review the permissions, and click Approve.
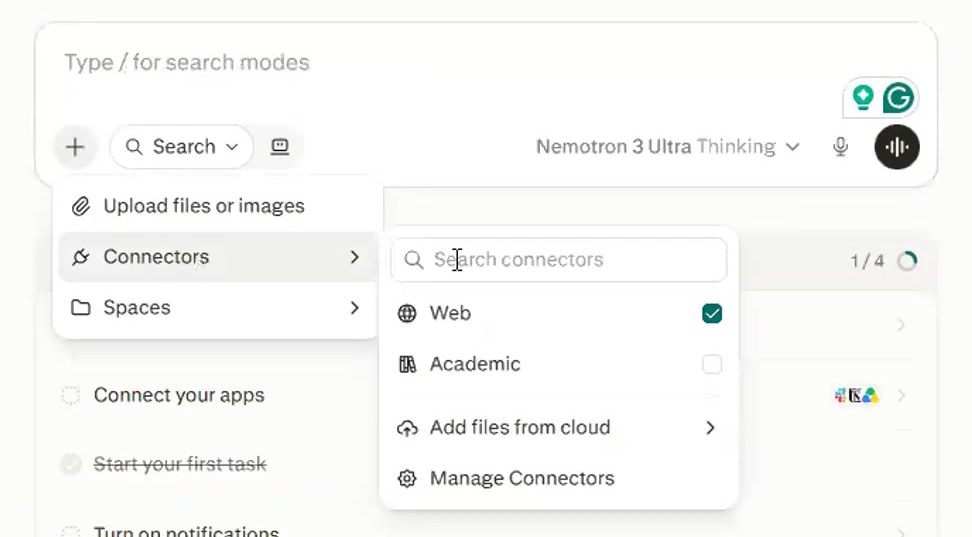
- Adding it doesn't turn it on by itself: in a new search click the + in the search box, open Connectors, and enable BLYSH.
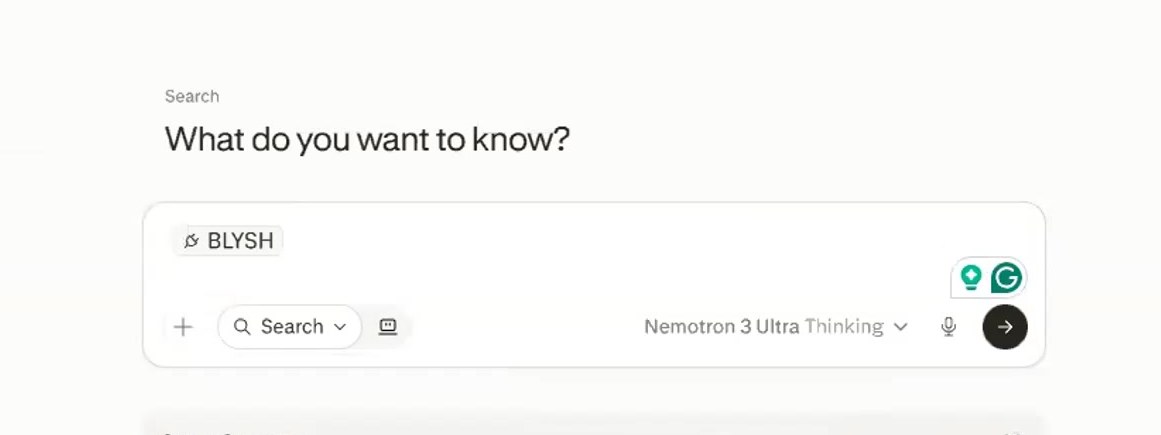
- When it's active, the BLYSH chip stays visible inside the search box, before your question.
- (Optional) With the chip on, ask something concrete, e.g. "find me a ruling about alcoholism and family law": you'll see the steps (steps completed) while it queries Blysh.

If Perplexity answers with web results and never mentions Blysh, the search went out without the connector: the BLYSH chip must be visible in the box before you send the question.
Need a hand?
If something does not look like the screenshots, write to us and we will walk you through it.